Showing posts with label Spring. Show all posts

Tuesday, May 30, 2017

Spring 2017

Most of the days this spring have looked like this...

But even though it's been a wet and cool start to the growing season and we are a bit behind, things are coming along nicely!

The garlic over-wintered successfully under a warm layer of straw. It's looking healthy and green!

Salad greens are still in full force and we're starting to harvest radish. Last week at the farmers' market I threw in a couple of radishes with each bag of salad mix. We should have more of both this week!

The tomatillos are flowering (which seems crazy early) but if the flowers can survive a few more cool nights they should have fruit set soon. I can't wait for fresh green salsa!


The next farmers' market is this Thursday at Greenway Station, 8am to 1pm. Hope to see you there!

Image may contain: 2 people, text
Kids' day at the market this week!

Friday, May 5, 2017

Countdown to the first farmers' market

It's a busy time here at Two Wheels Urban Farm, and next Thursday morning is our first farmers' market day at Greenway Station in Middleton. I plan to give a better update next week as to what we'll have for sale, including what garden plants will be available.

Until then, here's a brief update in photos!

The early planted veggies are starting to look like they could be harvested soon.

Because of cool temperatures, most of the plants still have floating row cover.

We set up the orange market tent and sign this week to make sure we had all the supplies we need and could figure out how to open up the tent!

Have a great weekend everyone, and look for information early next week about opening market day!

Tuesday, April 18, 2017

Spring tour of the urban farm

Spring is in high gear and there are chores all around! I love this time of year because there is always something going on. Below are some pictures I took yesterday to show how the plants and projects are coming along. If the weather stays nice and all goes well, we should be good to go for the first spring farmers' market on May 11!


Plants to sell at the first markets. The peppers are getting really big!

Taking a peek under the row cover, the green (front) and red (back) lettuce varieties are growing well now that the weather has warmed up.

The kale is looking good, too.

My dad and I built the last of the new beds yesterday. This one will be for some of our market cut flowers. (Now to build the fence to keep the animals out!)

The chickens love the spring sunshine! Me too!

Tuesday, April 4, 2017

Rain rain go away!

It's been raining off and on for a week, but I really need to work and the rain and wet soil are slowing me down. I really shouldn't complain, however. I noticed yesterday that our grass is starting to grow and my mom's lilac is starting to leaf out. Spring is really here!

Luckily about half of our plots (two of the three yards we farm) are raised beds, so I've been able to do a few things this week. Our third plot has traditional in-ground beds, so I am waiting on Mother Nature to give me a break and dry out the soil.

April showers bring May flowers!


A quick plug for raised beds 

If you are thinking of gardening, consider putting in a raised bed. Even though they require extra time and money initially, they pay off dividends over the years. Because they are technically soiless (at least the top several inches) there is very little hoeing and zero need to ever till (raised beds are typically filled with a mixture of compost, peat moss or coconut coir, and pearlite. These beds dry out quickly, which is a huge benefit this time of year, and they also heat up faster, allowing for earlier planting. Another advantage is there is much less weeding, and covering them with row cover is a snap. Check out Raised Bed Revolution by Tara Nolan for some inspiring ideas.


This week at Two Wheels Urban Farm

We now have three crops in the ground-- peas, carrots, and as of yesterday we have kale!

Because we use a very high intensity planting system, I used a ruler to make sure the kale transplants were spaced properly.

The two PVC pipes will be supports for the row cover cloth that will protect the kale from frost and later from insects.

When the temperatures warm up later this week, we will start to see more rapid plant growth!

We should have garden plants for sale at the farmers market this spring: heirloom tomatoes, peppers, herbs, eggplant, etc. 

I was reminded this week why we farm in town-- great neighbors and neighborhood, local shopping, and bike transportation. 


Have a great week everyone and enjoy these first warm days!

Tuesday, February 21, 2017

Rethinking spring

This week at Two Wheels Urban Farm

I realize this lovely spring is only going to last a few days before winter returns, but I'm really looking forward to warm weather sticking around for good! We have all of our seeds purchased and organized, and next week I will start sowing seeds indoors for spring transplants. I should also have a farmers' market update soon-- I'm excited to start selling produce and fresh flowers this summer. Stay tuned!


All this seed should keep me busy for a while!


Rethinking Spring

I returned on Sunday from my last vacation before the growing season starts, and it was a great trip! We ventured down into the Caribbean and I had a chance to tour around and check out tropical plants. I dreamed of what my urban farm might look like if it was in Jamaica or Key West-- bananas, plantains, bread fruit, all kinds of citrus, coconut, almond trees...


We visited local homes, parks, historical sites, and my favorite part was learning about the local trees and how they harvest and prepare the fruits.

We took a fantastic walking tour in Falmouth, Jamaica from a witty local named Erika. At the end of the tour she told us how 2016 had been the hottest on record in Jamaica, and from what I have read 2016 was the second hottest on record for the US. Interestingly, when we flew back to Milwaukee on February 19 it was a balmy 58 degrees-- if we had flown in the day before, it had been 67 degrees!

60 degree weather is a nice change!

So now I am wondering if I should adjust my planting schedule? For example, historically peppers are planted indoors on April 1 in this part of the country so they can be transplanted on June 1. In a more updated guide (one that I followed last year successfully), they recommend planting on March 4 and transplanting on May 13.

Should a grower trust the regional guides or push the dates because of an early, warm spring? Some things I think about:


1) Check out the land

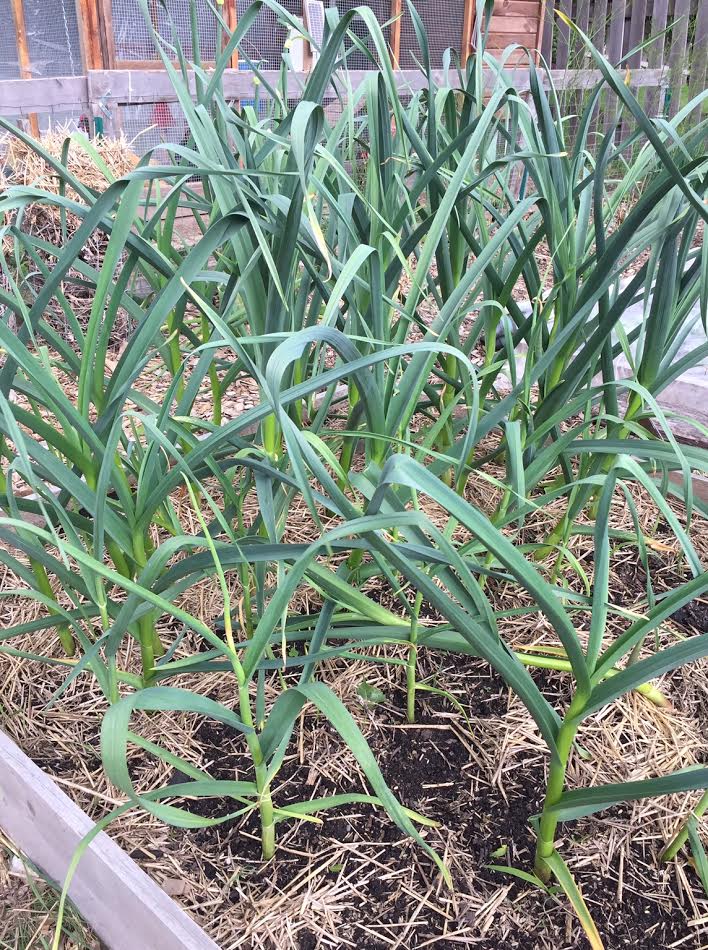
Our home plots are at the bottom of a hill (where cold sinks) so that probably means we shouldn't push the dates too much. Is your land protected from wind and very sunny so that it warms up early? If so, you might be able to gain extra days. Raised beds also warm up faster than soil. And sandy soil warms up faster than soil with a lot of clay.

2) Protect the plants 

Another way to protect newly transplanted crops against an unusually cold night (or extend the season in general) is to cover the plants with a breathable row cover. Using a jar or a milk jug as a cloche overnight will also protect sensitive plants from frost.


Row cover can often protect down to 28F for early crops such as lettuce and spinach.

3) What is the value of transplanting early?

To someone hoping to be the first person to market with a red pepper, planting early might be a risk worth taking. But if you are growing to feed yourself and your family, you might not want to risk losing your plants to frost for the chance of an earlier harvest. Also, if you grow your own starts, it is less expensive to risk a plant than if you purchase plants from a nursery.

4) Take notes

Taking notes of when you plant/transplant will really help out next year. Even though our spring is coming earlier, from year to year the changes aren't that noticeable, so I am able to use the previous year or two as a guide. I make notes of what varieties and how many seeds I plant, when I plant indoors, when I transplant or direct seed outdoors, the protection I use to keep the plants warm (if I need to do that), and when and how much I harvest. I look back each spring to the year before and see what changes I can make and am also reminded of my own best practices.

5) You can always fall back on your local farmers' market

One nice thing about living in an area with a thriving farmers' market scene is that there are always veggies to buy and enjoy! If your tomatoes don't work out, or if you don't have the space to grow all of the varieties of peppers you enjoy, check out your local farmers' market. Local food eaten in season is fantastic!

Monday, November 7, 2016

The urban farm in four short bullet points

I've been working on our farm plan, and one important step for me is determining the big picture of what our farm stands for and what our goals are. Today I'd like to introduce the four ideas that determine how the farm is run, what and how we grow, and the reasons behind our bicycle-themed name.

1. Two Wheels Urban Farm grows food sustainably using only organic practices. We do not use synthetic fertilizers, herbicides or pesticides, nor do we plant genetically modified seeds.

2. We farm in town, taking advantage of land that would otherwise grow only grass.

3. By living and farming in the city, we are able to use bikes as a major source of transportation as well as recreation. The farm has an ongoing goal to utilize bicycles for more than 50% of all trips.

4. We strive to make farming as local and accessible as possible, growing and marketing delicious food, while fostering relationships with consumers and neighbors and reducing food miles.


Speaks for itself!

Living and farming in town offers many opportunities to bike for pleasure and transportation.

This week at the urban farm

This past week we finished building the raised beds at the home plot. Before the weather turns cold I'll have them all filled and ready to compost over the fall and winter. By spring, with some added finished compost before planting, we should be good to grow!


The new raised beds more than double the growing space at our home plot, and because they are terraced, our hill is now farmable!

Even though my instincts tell me this could be a bad idea, one of our hens now has a name: meet Lucy, the Buff Orpington with the small comb. She enjoys long walks around the yard, eating worms in freshly turned soil, and peeking into the window to spy on unsuspecting humans.


Lucy has captured the heart of our family, especially my mom and DD.

We're also already thinking about spring around here and experimenting with our new light system. Can't wait to start growing next season's seedlings!


Some barely sprouted test tomatoes seem very healthy under the lights.

Thursday, April 14, 2016

Onions and garlic, or spring has sprung!

This was a big week at the urban farm-- I transplanted for the first time this year outside of the hoop house. Despite waking up to snow flurries yesterday morning and the frost free date being a month away, there are no nights in the nine day forecast with freezing temperatures. I now am officially stricken with spring fever! (It also means I have been stricken with bike fever and will need to budget my time better so that I can fit in some rides along with work.)


You can't beat this outlook!
Onions

The first crop transplanted this week were the onions. I am testing out both the transplants I started from seed (Red Amposta and Yellow Sweet Spanish Utah) and sets (Yellow Stuttgarter).

The advantage to transplants grown from seeds are the amazing number of varieties available and the bulbs should grow larger. I have never used sets before, and I found out how easy they are-- just buy and plant. However, there were only three options available at my local garden store-- just one each of yellow, white, and red. From what I have read transplants produce onions that store better, though a friend from the community garden has had the opposite experience. I'm looking forward to seeing how they compare!


Sets: I selected the yellow option.

Transplants: they look small now, but I am excited to see how they turn out.

Because our urban farm has a small footprint, I am using intensive planting methods, many of which are described in the book All New Square Foot Gardening. According to this book, you can plant 12 onions per square foot. Since I am going to grow onions to full size, I decided to plant only 9 per square foot (this is at least double the density of my onions last year). Because of the high density, it is important to keep plants evenly spaced. I ran across a website that had a great tip, using a muffin pan to map out where to plant.


This muffin tin had the right spacing to give me 9 plants per square foot.

My muffin pan grid keeps me in line.

Garlic

I am very excited to plant garlic this year-- my first very first time trying it in my garden! I was lucky enough to have several bulbs of garlic leftover from my CSA. They stored very well over the winter, so these are a good variety to save. I broke up each bulb and planted the cloves, just like the onion sets.

Enjoy your early spring everyone!

Garlic cloves-- each one will yield one whole bulb.


Thursday, March 31, 2016

Garden hacks to extend the growing season

The growing season around Madison is a mere 140 days (our grad school town, Raleigh, NC, gets 220 days). I have proposed moving to a warmer climate and have gotten the evil eye from my family. We do really love it here--even the snowy winters are a big draw for us. But I do need more time!

One problem I am currently dealing with is that it's time to plant tomatoes indoors and I am running out of room under my grow lights. I have a whole flat of lettuce that needs to move out to make room for my valuable tomato seedlings. After much reading this winter, I found some options for extending my season, and with these farm additions I can move some plants out and even start seeds outdoors now and could be harvesting cold-loving crops earlier in the spring and then again until Thanksgiving or later. Of course a heated greenhouse is ideal for growing year-round, but these are some easy, inexpensive options I'm trying out this year.


Cold Frame

A cold frame can be used for hardening off plants early in the year and growing veggies late into the fall. This project took a few hours, but other than buying the hinges, I was able to repurpose wood and other leftover supplies from my garage.

My new cold frame is built out of scrap wood and a used greenhouse panel (another option for the top would be an old window). To finish this frame, I'm going to paint the inside white to help reflect sunlight.

The plan for the cold frame was found in this book.

A thermometer helps monitor the environment inside the cold frame, since temperatures can really heat up on even a very cool but sunny day.


I placed the cold frame in a sunny spot facing south. When nights get really chilly this spring, my plan is to cover the cold frame with an old blanket and place a jug of hot water in the frame with the plants to slow the temperature drop overnight.


Hoop House

After building the cold frame, I decided to try additional cold weather growing options and see which ones worked best. According to the UW Extension, a hoop house can extend the growing season by 6-8 weeks, and I've noticed that most of the CSA farms around use them. My goal for the hoop house is to grow cool season veggies early in the spring (and then later in the fall), specifically the fresh spinach and salad greens I've been craving.

After I worried for several days about how to do it (I winged it since I didn't have written instructions for my specific plan) it turned out to be one of the easiest garden modifications I've made. The new hoop house sits over one of my 4' x 8' beds, and when the spring heats up it can be easily removed and stored away until fall.

The simple frame consists of 4 PVC pipes. The ground is soft right now, so I was able to drive them into the ground inside of the raised bed for stability. I made three hoops and used one across the top, and all of these were zip tied together. I also used wood stakes (two on each end) to add stability and keep the hoop house upright.

Hoops over the raised bed.

I found the plastic at my local farmer's co-op.

This is a temporary structure, so rocks hold down the plastic sheeting.

When the day heats up, the cover is easily rolled up and clipped.

Row Cover

Another trick I'm trying is row cover, which should provide protection down to 28F. I'm going to plant early in the community garden, and the row cover should hopefully provide some protection not only from cold weather, but also from hungry bunnies and birds. For early season crops like salad greens, the cover can be left on the plants 24/7 through harvest, which is a big bonus since I don't make it out the community garden every day. For especially cold nights, the row cover can also be used inside of the hoop house to add a second layer of protection.


Be sure to shop around. Prices vary widely depending on where you shop.


Monday, March 14, 2016

Expanding veggie production

Because of my small piece of land, I plant my annual vegetables very densely, giving each plant exactly the space it needs and no more. I was inspired by the book All New Square Foot Gardening by Mel Bartholomew, and after learning about his method I was really excited about minimizing footprint while maximizing harvest.

When building raised beds, any size works, though narrow boxes work better so you can reach into the middle without stepping into the bed. These beds are just boxes that can be created with anything: wood, cinder blocks, rocks, or bricks, with the main concern being to use something that will not leach toxins.


Boxes are simple and can be made of any safe material.
The potting soil mix in the square foot gardening book (1/3 compost, 1/3 peat moss, and 1/3 vermiculite) is high in nutrients, drains very well, and is light for easy weeding. My original boxes were built to these specifications and have done well in past years.

Plants growing happily in a box, summer 2014.
For my 2016 boxes, I have two types of new boxes: 4' x 4' boxes and 4' x 8' boxes. The 4' x 4' boxes are pre-owned, pre-fab kits that a very generous friend gave me, and they are made out of a composite material (something like this). Two of the new 4' x 8' boxes are made from new, non-treated cedar boards, and the last new 4' x 8' box is made from repurposed 4" x 4" cedar posts. I attached the boards together using self-tapping deck screws, so I didn't need to pre-drill.

For the soil mix I ordered two square yards of Purple Cow Organics compost from a local store, which turned out to be just right for the new boxes and left a small amount to mix into each of the old boxes--a big shout out to my father who spent a whole day helping me shovel and haul the pile off of the driveway! I also bought bags of peat moss at my local garden store and deviated from the original mix by not adding the vermiculite, which I will likely mix in to the new beds before planting.

Peat moss is a non-renewable resource. I am investigating alternatives for future raised beds.

In the new 4' x 4' boxes I used old coffee burlap bags as a weed barrier. For the 4' x 8' boxes I decided to do something different-- I put down a layer of wet newspaper.

This moist layer should attract worms to my box as well as discourage weeds for the first season. Eventually the newspaper will be incorporated into the soil and I will be able to use these boxes for deep-rooted veggies.


Annual vegetable bed expansion history:
  • 2012: 64 sq  ft of raised beds
  • 2015: 88 sq ft of raised beds + 200 sq ft community garden plot                                             
  • 2016: 216 sq ft of raised beds + 200 sq ft community garden plot

Two of the new 4' x 8' boxes on the left. New 4' x 4' boxes at the bottom.


Thursday, March 3, 2016

Spring is getting real around here

Ok, I admit there are still several inches of snow on the ground, but now is the time to start thinking about planting (actually, the summer veggie growing season started about 2 weeks ago!). In my first years of gardening I made the mistake of waiting until the first warm, sunny, true spring day (probably mid-May here in Wisconsin) to decide to plant. Because I was so late getting started, I hurried to the home and garden store, or worse, a big box home improvement store, to buy whatever veggie plants they had left over (since everyone else in town suddenly also had spring fever-- it is highly contagious). The veggie plants I bought were expensive and likely not the ideal varieties for my region. For this farmer who loves a little thrill, they were probably also very boring varieties. Pick up any seed catalog and you'll see just how many fun options you have.

Fast forward a few seasons... this year I am continuing a system I started last year:
  • buy seeds early
  • for long-season crops, plant them indoors on time 
  • transplant or direct seed outdoors as early as possible
These practices allow me to not only plant unique or delicious varieties that will grow well in Wisconsin, but by planting early I can extend my growing season and maximize on my rotations (early crops, mid/late season crops, and fall crops).

Right now my system is not so fancy: shelves in a bright, southern window with a few grow lights hung to provide extra light in the morning and evenings. In the future I want to build one of these babies:


But for now, I'll work with what I have. I started some onions two weeks ago (in the back) and my current batch of microgreens (in the front):


I ran across the very handy University of Wisconsin's regional planting guide (starting on page 5) that lets me know when to start different plants indoors and outdoors. It is fantastic and I'm not sure how I grew vegetables without it. I would guess most locations have a similar resource (in the US, a good first step would be to check with your local university extension agent).

For the second year in a row I am also writing down the varieties I grow, how many seeds I start, and what the germination percentage is. This is helpful for next year to know how much to plant and whether I should plant extra seeds to get the desired number of plants. Some notes from 2015:


I'm also trying out the kindergarten thrifty urban farmer paper cup method of starting seeds. I may need to transfer them to larger pots at some point, but I know some seeds won't germinate, and some plants will germinate that I won't need, and so this is a very cheap and easy way to get things started.


So March is here and my first year of urban farming full time is off to a good start! I planted those onions on Valentine's Day, and today I started the peppers and eggplant. And although fat biking on the local pond is a ton of fun, I am ready for the snow to melt!